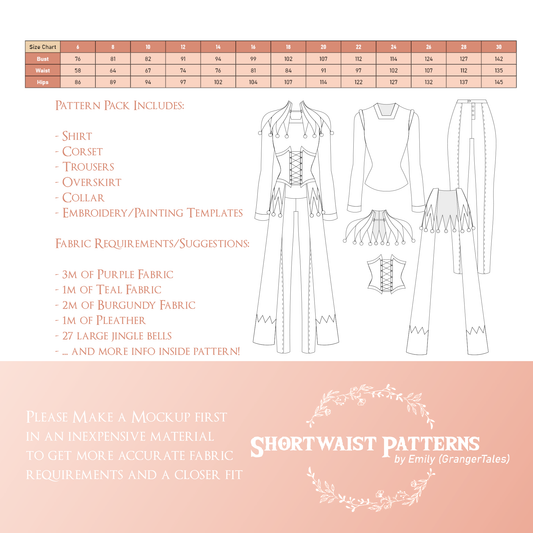
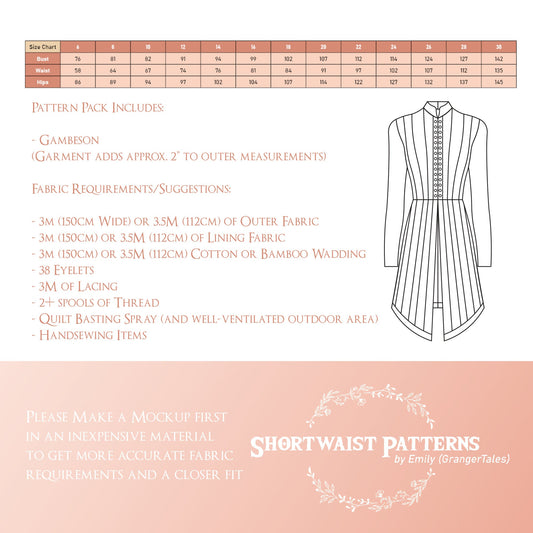
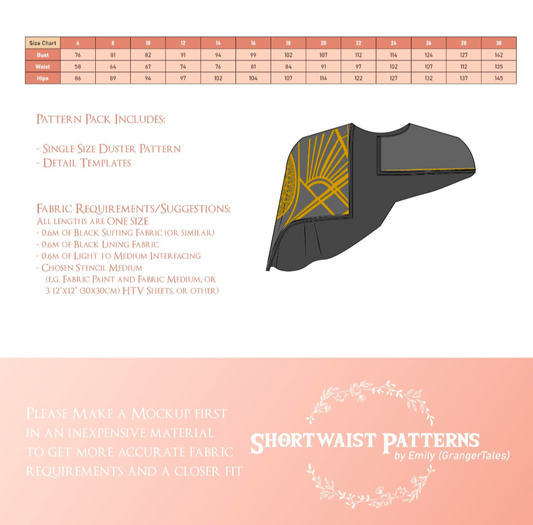
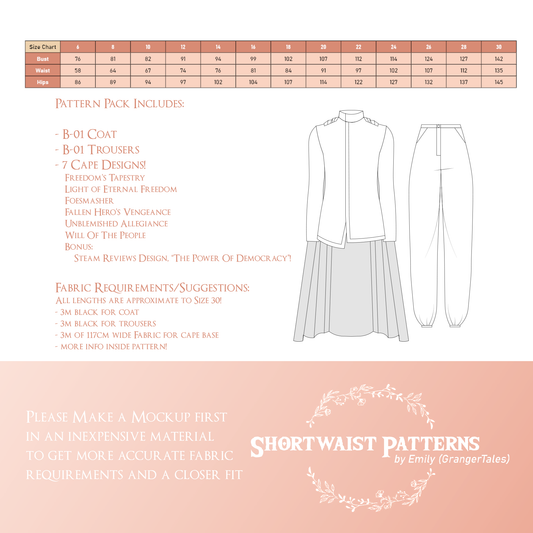
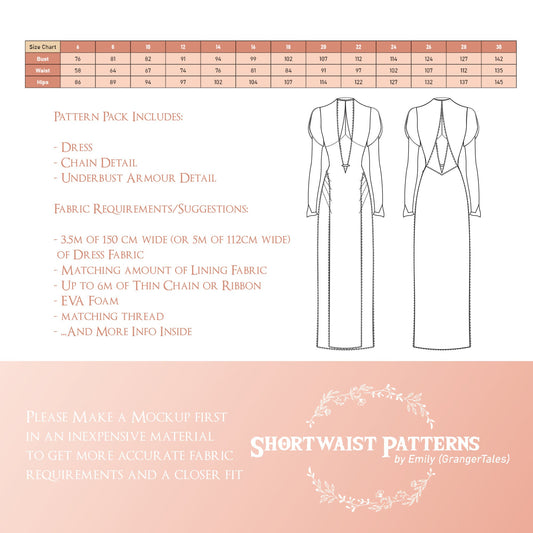
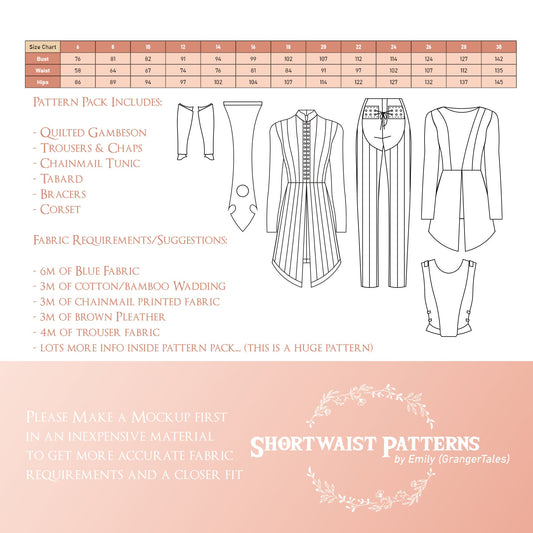
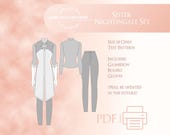
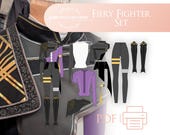
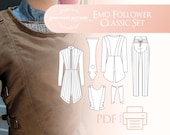
Do you have a standard or custom size chart?
My brand's size chart is completely custom, and built with a short waist in mind - hence the shop name! This means that your ribs and your waist are quite close together, but your hip bones are much further from your waistline than the average size chart would indicate. Short waist/Long bum problems are solved right here!
My shop is currently undergoing a huge update, where all old patterns will be receiving a size upgrade, and more instructions, photos, and more! If you purchased a pattern of mine that has since been upgraded, message me and you may be eligible for an upgrade to the Version 2!
I can't print my pattern - It keeps printing out a single blank sheet/only a small part of the pattern!
My upgraded patterns will not have this problem, but my older patterns are required to be opened in Adobe PDF Reader, and printed in "Poster Mode", which automatically divides up the large scale pattern into the printer's default paper size. This mode is only available for free in Adobe PDF Reader!
I haven't received my download! Where is my pattern?
Once you've purchased any item from my shop, the website automatically fulfills the sale by emailing you a PDF called "(Pattern Name) Download Link". Due to the sheer size of some of my patterns (and my system of being able to update patterns for you remotely for free) you'll need to open the PDF and download the full pattern file set from that link! It will automatically open a new browser tab and download the files to your Downloads Folder on your PC or Phone.
Keep that PDF file coped to one or more safe digital places so you can always have access to the file you purchased!If you didn't receive that Download Link PDF (and you have waited a day for the email to show up, and checked your spam folder), contact me! I'll need the email you purchased the file with to verify that you bought something, then we can fix the issue together. :)
I always choose my pattern size by Cup Size - why don't you offer this in your general patterns?
Cup Size is a measurement specifically for bras - It consists of 3 measurements: your Overbust Circumference, your Bust Circumference, then the number that remains when you subtract the latter from the former. That third number means the Cup Size! And as you can probably guess, that varies hugely, especially as people's breasts sit at different heights, curve differently, and we like them to sit in our clothing in certain ways.
It's best to make a mockup first, so you can tailor your bust area to the shape of your bra so it can fit its absolute best.
Why don't you sell the US/UK/AU Clothing sizes?
Because none of those fit me, and that's why I started sewing! I created a custom size chart because a lot of my friends and I couldn't find clothing that fit us, so my size chart is to fill a gap that exists between the standard western size charts.
Custom and personalised orders
Custom and personalised orders are not available, but you are welcome to message me with a pattern suggestion and I'll add it to the list! However, this list is now years long, so don't expect it immediately!
Sizing details
My Custom Size chart is a mostly even grade that corresponds to actual clients, friends and family that I have measured over the years, and a lot of data that has been accrued in that time. It leans more towards a short bodice and long hip area, as well as a smaller bust and larger hips - not usually found in international size charts.
My pattern is not downloading! How do I access it?
If you purchased from Etsy using your mobile phone, they don't actually let you access your downloads (true as of May 2025) for some reason! (very frustrating, and an old issue they still haven't fixed). You'll have to log onto a computer (family, friend, or maybe your local library, just remember to log out afterwards!) and download it. I recommend sending the file to yourself through an email, or copying the files to a Drive or Dropbox where you can access them anytime afterwards.
How do I print my pattern?
Open the PDF (it opens in Adobe PDF Reader for me, and is usually default for a lot of computers now - otherwise it is free on the Adobe site), and press Ctrl+P or Cmd+P. This will either automatically print all pages, or open a dialogue box with printing settings. Ensure your printer is set to AUTO or 100% scale - this is NOT "Fit" or "Scale to Page", as this setting will shrink the pattern by about 10%! The settings may have been changed at some point on your printer and stayed the same, so it's worth checking before printing 90 pages wrong. There is a centimetre ruler and an inches ruler (5cm and 5") on every page of the pattern that you can check against your own ruler or measuring tool to check it printed correctly including the first page.
Which size do I print?
Some of my patterns are currently just one size, so that choice is easy, but some are multiple sizes, and you can print each garment in the pattern packs individually. If you are making with a shirt, try to match your Bust size (and bring the waist in or out), and if you are making trousers/a skirt, try to match your Hips! If you are making a dress or coat, I recommend picking the size that matches your Bust better, as the bustline affects the armholes (aka armscyes), which can be very difficult to alter for beginners. Just expect that you will be making a mockup with the intention of making some alterations, and get one of the sizes right out of the three! The waist is the easiest to alter of the main three measurements.
I printed the pattern and there are big margins, triangles, and dotted lines on the top and right pages?? And no dotted lines on the top of the A row?
When you print anything, the printer adds ink to the page, and the friction of the printer head (the thing dropping the tiny dots of ink on the page to make the picture) can heat up, caused by the output of excess energy (remember high school science?). So you've just added Hot Wet to paper, which is traditionally made out of tree pulp and water (tree smoothie). What happens to paper when it gets Hot Wet? It stretches and wobbles and turns into Not Flat. The stretch is hard to see unless you know what you're looking for, and while the edge of the page might be as straight as ever, the middle of the page would be the Hot Wet Not Flat, and the resulting sogginess caused the deformation. This was just Tumblr speak to explain how paper shifts within the printing machine, even by a smidge, offsetting your print and losing valuable information in the margins.
To counteract the Hot Wet Not Flat, I added wide margins to the pattern, so that no information is lost in the deformation of the printing process, which can be vital when dealing with large scale printing (1mm offset at the top of the page can end up being a whole 10mm at the bottom).
To also help with the Hot Wet Not Flat, I have added the triangles and dotted lines - I know that printing upwards of 4 pages to assemble a pattern at home is extremely time consuming and hard on the back muscles due to crouching/stooping, so I recommend tackling it over 2 days (at least).
First day: Print the pattern out. Cut on the margin side of the dotted lines, snipping off the right side and top side of all pages (don't cut down the middle of the dotted line, because that's actually within the printable space, just cut right next to it). The triangles along the edges of the page also line up next to each other to form diamonds. Go enjoy the rest of your day/evening, especially because that probably took an hour by itself for some of the larger patterns and you sat still for that whole time.
Second day: Sticking the pages together! Overlap the cut sides with the uncut side of the adjacent page (e.g. the right side of A-2 overlaps the empty left margin of A-3, and the bottom of both of these pages are overlapped by B-2 and B-3, and so on). Roughly cut out the pattern pieces (optionally, you can cut them all properly right now). Go enjoy the rest of the day/evening.
Third day: (optional) Now cut out your pattern pieces properly! This would also be the day you could quickly add/remove from the pattern pieces, because you can line them up on the bust/waist/hips line and calculate what needs to be added/subtracted before you even cut them out of fabric. Very useful to do this on a separate day because you'll still have the scrap paper to help adjust the seam lines! If you're a complete beginner, you can just head straight into the mockup instead of fussing with paper first.
Which paper type do I print? (A4/Letter/A0/Arch E)
This is all about where you live! If you're North American, you're probably going to print Letter on your Home Printer, or you can take the A0 file to a place like Staples or Office Depot and get it printed on Arch E type paper (large format) if you hate sticking paper together. The clerk will center the document at 100% scale (not fit or scale to page like I mentioned above) and some there still might be some pages to stick together, but a lot of the hard work will be removed for you!
For the rest of the world, it's usually A4 for your home printer, and A0 at the print shop. You can measure the paper in your printer and google the size to see which paper type you'll be printing!
The first page of the pattern is the same for every PDF in the download. Why?
I find myself easily distracted and forgetful, as well as quite busy, so a long time ago I fell into a habit of purchasing a sewing pattern and then not assembling it for a very long time. I would put it in a plastic sleeve and forget about it for a few years, and then get confused about what it was when I finally pulled out the pattern again if I hadn't added any notes about what was inside.
So if you do this, you can treat this first page as a cover sheet of sorts, to remind you what the weirdly marked pages are in the plastic sleeve, and what the pattern is called, etc, etc. I do it for all of them because there's no guarantee that everyone will print out everything. Feel free to skip the first page of the patterns if you're one of the more focused one-project-at-a-time sewists! It's not as important for you. Also, this page can be flipped over and used to alter the pattern pieces if you need!
How do I assemble my pattern?
As mentioned in a question above, you cut the dotted lines, overlap that side with the adjacent page by matching up the triangles until they form diamonds, and using sticky tape to stick them together! I did this because I too have dropped a 50+ page pattern without any markings and messed up the page order. We are but humans doing our best, and every so often gravity wins. It's a hard life, isn't it?
The pages also have a Letter and a Number on the center top, e.g. A-2, A-3, B-1, B-2, B-3. Every Letter indicates the Row, and every Number indicates the Column. So all of the A pages run across your workspace, from left to right, and all the 2 pages run downwards. The first page (A-1) is the cover page in most cases, so B-1 sits underneath nothing, but next to B-2. B-2 sits underneath A-2. Once the pattern is done, you could technically run a large-scale game of Battleships with a friend (if you both have your own set of patterns) because of its grid-like formation.
What pieces go where/how do I sew it all together?
If you bought a finished pattern, it has instructions! I describe the order in which to sew things, and what goes where, and in what direction - some with photos too!
A lot of my patterns currently do not have instructions - a sad truth that I am working hard on every day to correct! But generally speaking, I try to provide a diagram or label the pieces to help them be grouped correctly, even if you have to refer to images of the characters online yourself to figure out the rest of the puzzle, when the instructions are not available yet. For example, all "Sleeve" pieces go with the sleeve to construct it fully (don't add any Bodice pieces into the mix), and most of the patterns are drafted on the left OR right side, so the printed pattern can be lined up to show you what one entire half of the outfit looks like.
Generally speaking, a rounded curve in the top half of the bodice is on the Bust line, and a slight indentation would be the Waist line. The widest part of the Trouser is likely where the Hip line sits. The pattern (if drafted as a half) stops vertically at a center line, whether it be Center Front (CF) or Center Back (CB). The neckline is the top of the Bodice Front piece (and Bodice Back), and the armhole (armscye) is a slightly deeper curve than the bust, usually located on the Side Front and Back. The armhole tends to be connected at the top on the Shoulder Line. All of these locations can be wildly different depending on the cut of the pattern that I have designed, but can't really move that far out of the assumed area! Human bodies are very unique but still have some limitations in overall design (evolution hasn't had a chance to get crazy with it yet).
The pattern I bought is only one size (e.g. "Size 18, Pre-Order for S6-30), when will it be all sizes?
As soon as I can manage it! I am one person working 60+ hours per week to keep my business running (I need to feed my cats) and a surprising amount of the job is admin tasks, which can keep me from grading patterns for an uncomfortable amount of time.
Not only do I make the Size 18 (which is my first run of a pattern, the sort of 'early access' edition for those who just need a head start and are happy to modify from a base) I have to write the instructions, make the WHOLE THING (I also have to purchase everything on the shopping list supplied) whic is called a Sample, photograph every step in that process, wait for paint to dry, resin to cure, packages to arrive, then I make the digital pattern in 12 MORE SIZES (which is a lot of maths), photograph the Sample (sometimes I have to wait for the weather for that), and then I publish it on 5 different websites - all while answering questions about all of my other patterns online (I have 40+ of them now), for customers in various timezones! Not only that, but I have to feed my cats and have my own life away from work as well.
For example, Alfira (Bard In Me) took 4 months of work. Isobel (Moonlight Martyr Set) also took 4 months, and technically, she's still not complete! In stark contrast, my Full Circle Skirt pattern took 3 days, a breeze in comparison to the complicated cosplay patterns I produce. To provide another example, the one-size Clair Obscur Duster pattern took a week of chaos (no breaks) to finish publishing, where if I had slowed myself to a reasonable pace, it might have taken 2 weeks instead. And it's only one size! Complexity is a huge factor in this, and really can't be planned precisely until it's over.
I can't guarantee when the upgraded version of a pattern will be completed, because all of them are at various stages of production, and I have to push the more popular ones to the front of the queue (I will always prioritise keeping my cats fed and happy).
I try to announce pattern updates as they become publically available in the Shortwaist Patterns Discord! They are historically visible and searchable via the #pattern-updates tab, so you can do a quick search in that channel to see what has changed in your pattern since you purchased it!
You can also join the Shortwaist Patterns Discord and check out the troubleshooting channels that are available for every pattern. These also are a big log of people asking me questions about the pattern and my answers - and sometimes the answers of other sewists in there (which is so amazing!! ♥) - so if you're having trouble there's a chance someone else did, and I already answered the question for you. If you have a different problem, feel free to ask it there, and I will help you out as soon as possible!
I can't afford to hire employees to take on Admin, Customer Service, or Social Media, so I am doing the work of 4 people for now - my internal Patternmaker is very sad about it, but one day I hope to change that. Then I can finish my patterns WAYYY faster!
TL;DR: ASAP - but if it's taking too long (because I'm the only person making these patterns), jump into the Discord where myself and other people who have probably made the same pattern can help you out!
Should I just use the Size 18? I am a different size and have a deadline sprinting headfirst at me, so I can't wait for the full grade.
Yes! Start with a mockup, look up YouTube videos on how to change the size of a pattern, and jump into the Discord so we can help ease your stress!
How do I get alerted to the pattern updates?
There are legalities concerning my messaging you online first (as I am a business entity as Shortwaist Patterns, even if you know my first name and we've chatted before), especially in the USA. You have to message me first to give me permission (just like subscribing to a newsletter or similar). So jump onto Instagram, Discord, Etsy, or similar, and ask if I can message you about a pattern update! I then add you to a list of people who have also asked me to update them, and as long as I remember to check that list when I finish the update, you'll get a reply back on the same platform (not your email, unless you explicitly stated that you wanted that and gave me the address).
If you prefer a 'don't perceive me' approach to your online interactions, join the Shortwaist Discord and check the #pattern-updates tab, or follow my instagram! If it's a big enough update, I try to post there as well, usually in my Stories. That way you can safely lurk and enjoy your pattern updates!
How do I access the updated patterns?
Use the original link you downloaded the file from - this could be on Etsy, in your emails, or even the "Pattern Name Download Link.pdf" file where you access the original version of the pattern. Just click on it again! It will download the new version, free of charge.
You don't have to buy the pattern again to access it (I do see this from time to time, and I reach out to check when I notice it because sometimes it's by mistake! If you're doing it to support me though, thank you!)
Where are the instructions?
Not all of my patterns have finished instructions! But if they are part of the pattern, they will be in the files you downloaded from the Download Link PDF.
Should I print out the instructions? It's so many pages... ;_;
If you're doing it to access the checkboxes next to each step - you don't have to print it! You can check them on the computer!! It's so neat. Just make sure you Save the PDF every time you change it, as it becomes your unique working document for tracking your progress that way.
If you know you work better with a little printed out booklet with a stapled corner that you can write notes all over though... you'd better print it. You can still zoom in on the digital version to see the pictures better if you need to!
I can't access my old login to redownload the pattern on Etsy/Gumroad/Shop app/Instagram/my email, what should I do?
Message me! You will need to give me some information so I can match you with the order and make sure you're not scamming me. I'll usually need your Order Number (it's on your receipt), and the timestamp for that order, the name associated with that order (it will suck if it's a deadname but I need to verify info), and if I need even more info I may ask for your address. I won't ever need your bank details or any passwords, so don't you get scammed either! If you don't have access to your order number, it will be a lot harder to match you up. If I can't match you exactly to the order, then I will assume you're trying to scam a free pattern off of me, so make sure all your details are correct!
This may happen because I've had to move the files for whatever reason, and subsequently the link has broken. But I can send you the new link after verification, no problem! :)
Is this pattern for men/male body types?
Generally speaking, yes. They are drafted from a primarily female set of measurements, but the bust sizes are not as big as commercial patterns, and the difference is easily removed in a mockup! Sometimes I will label a pattern as unisex, meaning the pattern is designed to be less curvaceous. Just because I'm wearing it in the photo, it doesn't mean that it's just for female/AFAB bodies! When doing alterations, be true to your final form, and wear your binder/appropriate underwear when testing the fit at every stage. Clothing is made to fit all bodies when made with enough care, and a few or many adjustments will be required to achieve the correct fit.
I want to commission you for a pattern/finished item!
Nope! I have no time, my commissions are closed for the foreseeable future and have been closed for years. I live in an extremely isolated area, and shipping is a fortune, which will end up in the cost you pay me for the work. Very few people want to pay for an item that is worth a 5- to 6-digit sum at its cheapest, so my commissions are not open. Although, if you do have that kind of money to drop on a commission upfront, drop me a line. ;)
The pattern didn't fit me even though the Bust/Waist/Hips matched my size!
Length of torso is a hugely overlooked adjustment in patterns! Sometimes, a persons' ribs end barely 1-3" above their natural waist (this is when you are "shortwaisted" oooh title drop), and sometimes the waist is far below the usual 4-6" below the ribs (longwaisted). This results in the waist and hips being too tight or baggy on your body, and they need to be shifted up or down to be able to fit!
Another thing to consider is Front Torso versus Back Torso length. If you're a shrimp-postured gamer, your back length is actually longer than your front length when you standing naturally, which can result in things like a dress being shorter at the back than the front, or a cold lower back when you wear a T-Shirt, or even exposed cleavage due to too much fabric at the front. If you decided to work out only your pectorals for a year and didn't do a single back extension to balance it out, you would have the opposite issue. Similarly, fitting trousers is notoriously difficult, as some of us have no padding in the back, or might have a dumptruck's worth of cake, and either the same or opposite in the front, and the legscye of the trousers should be altered to cater for this.
Finally, bodies aren't even symmetrical, and scoliosis isn't always to blame! If you wear a handbag or do a lot of computer work, you can end up with a 'dropped shoulder' - the harder working muscles around the neck tend to be lifted and bigger (heavy bag always on the same shoulder) and unsupported, weak muscles are used to being a bit droopy (the shoulder that controls your computer mouse tends to hang lower as you scroll spreadsheets for hours every day). This can lead to weird wrinkles around the shoulders and neck, and the lengths on either side. There's a lot to consider outside the main 3 measurements! This is why mockups are so important.
What's a mockup?
It's the cheap practise version of the final garment! You practise the steps of assembly with way cheaper materials and test the fit of the garment, making any changes to the pattern as you notice them. It saves a LOT of time, money, and stress. Never skip the mockup!
What do I need to make a mockup?
If I indicated non-stretch fabrics in the pattern (e.g. cotton, brocade, satin) then you can use the cheapest non-stretch fabric in the shop you like. It doesn't need to be the same colour! Bedsheets and paper also can work in a pinch.
If the pattern needs stretch fabric, it has to be a stretch mockup. And stretch fabrics do so at different percentages (SO annoying, but also very forgiving!) from around 10-15% up to 200-400%! This is NOT linked to the amount of elastane or viscose in the fabric, and can be unique even through the different runs (years between production) of the same fabric if you're unlucky! Ultimately, I recommend getting up to double the amount of the final stretch fabric for the mockup if you can't compare the amount of stretch in person.
To measure stretch, find the stretchiest direction (weave, weft, or bias, or any direction if it is 4-way stretch) and mark 10cm (or 10") of fabric in that direction.pin the start of this 10cm line down so it can't go anywhere, and place the start of your ruler there. Grab the 10cm end point and stretch the fabric along the ruler until it stops, and take note of that number. Gotta do some quick maths now, but if the fabric stretched to 12cm, it's 20% stretch. To 15cm, 50%. To 20cm, it stretched 100% further. You can do this without marking the fabric if you're careful!
You will also need any zips and lacing - I personally don't bother making buttons or eyelets in mockups, I'll just pin a button area closed or cut holes for the lacing to go through as I need it. A mockup can be as lazy or exact as you like!
Do I need to make the whole outfit as a mockup?
This depends... if you're a beginner - YES. Practise everything, and always start from the garment closest to the skin outwards (they have to get wider because the more layers, the further the outer layer has to wrap around). If you're an expert, probably not, just the stuff you want to be very sure about. And if you are any level but come across a technique you haven't used before, you probably should practise it first!
Why? Because it's cheaper to make a mistake in $1/m fabric than $40/m fabric. And practising is the best place to make mistakes!
And I wouldn't bother about the lining unless the outfit is skin tight. Lining can add a surprising amount of thickness and stop a tight outfit from closing properly! Queue heartbreak :(
What's yardage? And what's notions?
Yardage is the fabric width and length required to make the garment (I have never heard it called fabricage). Notions is the stuff like buttons, zips, buckles,, EVA foam, lengths of lace, all the tiny hardware and extra bits that is not considered "fabric".
What's a grainline? What are the arrows all over the patterns pieces (and why do some pieces not have them)? What's selvedge, weave, weft, warp, and bias? What's right and wrong side? Why is nap if not bedtime? Hand?!? WHA-
Fabric is usually woven on a giant industrial loom (not all of them, but I'll explain using this anyway because it is the most common) where thread hangs between various pieces of machinery and a shuttle filled with thread gets passed between the strands left-right-left as the loom clicks some of the threads up and down, swapping constantly as the fabric is woven. A day in a loom's life looks like: up left down right up left down right up left down right snip snip. Nice and simple, but endless with maintenance.
The fabric width is set by how wide the machine is - the selvedge is the thicker edges of the fabric, with the little puncture marks and holes. The loom holds onto the fabric with threads passed from the arms on the side, with the thread entering the top of the selvedge (the "right" side) and exiting through the bottom of the selvedge (the "wrong" side). If you're a fan of forensic science, you can think of it like an 'entry' and an 'exit' but wayyy cleaner. So if both sides of the fabric you purchased look 100% identical to you, you can feel the puncture holes on the side of the fabric for the enty and exit. This can be a lot harder after pre-washing and ironing, but not impossible. Some fabrics are printed with a brand, name and/or printer's marks (a bunch of coloured circles, which tell the fabric printing machine which inks were used in printing that colourway), which is on the right side of the fabric (the entry side). Honestly, the "right" side is the one you like better, which is the side you want to be on the outside (the visible side) of the finished garment, so you don't have to be perfect about this every time.
The warp is the up down threads of the loom, also called the grainline. It runs parallel to the selvedge (along the fabric length). In my patterns, I want you to match any arrows on the patterns pieces with the grainline, which means that arrow should be pointing in the direction of the warp! The only exception will be if the garment needs stretch fabric, and I label the arrow with "in direction of greatest stretch". If you place the arrow so it points to the selvedge instead, that is called cutting the fabric on the "crossgrain", as you are cutting across the grain. It mostly affects the strength of the fabric, any reflectiveness, nap, and can also fray a lot faster in some cases!
The weft is easier to remember - go left of the selvedge. It's the direction the shuttle goes during the weaving process. It's the crossgrain!
The weave is a little deeper in the weeds. The reason satin and cotton are different is because of their weave, or rather, the way they are woven. Which is important to remember when you are holding 100% cotton twill in one hand and 100% cotton satin in the other and your braincells keep trying to jump ship about how obviously different they are. The weave of stretch fabrics can also differ. Not all stretch fabrics are knit! See, it's getting more technical now. The important part is that woven stretch fabrics can have a little ease, and knit stretch fabrics have a lottle (it's kind of their thing). To put it as simply as possible, the weave is the way the loom is set up, and the order in which the shuttle passes through the threads, which can get kind of crazy, but this order is why we have such a wide variety of fabrics available to us today. Everyone say, thank you engineering. If you would like to dive deeper, searching online will yield a lot of experts in the field and drill right down to the nitty-gritty details, and it can get very interesting! But it's not necessary to know much about it unless you're in manufacturing or working in a fashion house, and you certainly don't need to know it to construct any of my patterns! Weave can be learned through vibes, honestly. It can take practise, but eventually you will just recognise the fabric by its "hand" or by eye.
Hand is when you pick up a fabric and can immediately sort of diagnose it with fibre contents, weight, how well is drapes, and how it will behave as a fabric. Like how it handles! Consider it vibes-based. If you tried to use a thick linen for a flowing ballgown, it would look like it was made of folded paper. Conversely, using rayon for a petticoat will mean your petticoat hugs your legs and slips around, doing absolutely nothing to push the upper layers of the dress outwards, making the overall effect quite floppy. Fabric hand is probably the best skill the develop over your time sewing, and is best learned via fondling fabric bolts in person and making mistakes.
Nap is when a fabric has a given direction for the fibres, or the print. It means that if the fabric is turned in the 4 different directions (along the grainline, crossgrain, and by reversing them both) if will look or feel different. Corduroy and velvet have a directional nap! If you hold velvet in different directions, it reflects light differently, as well as feeling smooth or prickly when you run your hand over it. So if you cut your bodice front out of velvet with the arrow pointing down, and then the sides with the arrow facing up, the bodice would be darker and lighter on each of these pieces! Corduroy does the same thing, even though the fibres are wayyy shorter. Pile is also used to describe this, but it's same-same-but-different. It describes the fibres (fluffy) of the fabric as much as direction.
A directional print is also a nap, meaning that if you cut a circle skirt out of a fabric with a nap, the fabric might look correct on your front but would be upside down at your back! Stripes, tartans, ginghams, plaids, checks, all fall under the umbrella of "fabric with nap".
And finally, bias! It's a 45-degree angle from the selvedge, running perfectly between the warp and weft threads! On non-stretch fabric, the direction of the bias will have a different amount of stretch (more) than the weft direction or the weave direction. This can be tested simply by pulling in the three directions of the fabric. This stretchy factor is why bias tape is such a useful part of your sewing kit, and why I use it in a lot of my patterns. That stretchiness means the fabric pulls neatly around curves and wrinkle a lot less around a curve than the same tape cut on the grainline. Bias just acts differently to grainline vene when they're cut from exactly the same fabric, and it's useful for those extra stretchy properties! Hence the trend of form-fitting bias cut dresses!
There is no "Shopping List" in my pattern - how do I find out what yardage and notions I need?
First, mark out your fabric width (selvedge to selvedge) matching the width of the fabric you're looking to buy. If you want to get technical, you can just measure out the half width (selvedge to middle), because you're likely to be cutting two mirrored pieces of most of the pattern (unless you're making a Clair Obscur pattern), and treat one of the long sides as "folded". Then lay a measuring tape down the selvedge of the "invisible fabric". Lay all the pattern pieces on the floor that you would cut out of the same fabric. Line up the grainline so it runs up/down the fabric, and fit your pattern pieces into this designated rectangle, adding length as required. Some on the fold pieces can be copied to become full width (you might only have to cut one piece that way, not two!) so it does take some careful maths. If you think you got it, add one more yard/metre for accidents (or bias tape), then order. If you know you got it, you probably don't need to add anything extra.
Notions can also be counted out on the pattern pieces, or even from the character references. Eyelets can be different between sizes in my patterns, for example, so it's good to check the pattern that fits you for an accurate count.
I can't buy fabric in person (RIP JoAnns), how should I look for the right fabric?
Do careful research online about the fabrics you think you want, and if at all possible, talk to others who might have a chance to handle the fabrics and pass their opinion to you! You can also order samples and swatches before ordering the full amount of fabric! It takes more time, but it's not a waste of said time if it lets you choose the fabric better!
Do you have a YouTube? I want to watch you work (and maybe I don't even want to sew, I just like watching people sew!)
Not yet, but I would like to in the future! I have a sewing channel with no videos on it yet, if you would like to subscribe in advance!
You mentioned that you were making <unpublished pattern>, where is it?
In my backlog! And I'm working hard to get through it all. It's likely that it is waiting to be tested by my pattern testers, or was a Patreon monthly reward and therefore has a delayed public release. Overall, if I've mentioned it in the past, there's a good chance it has been started but not finished enough to even be a single size pre-order release.
If you're keen for it, message me! I don't know something is popular until I'm told (I spend a lot of my day offline so I can focus properly) and popularity will speed up the patternmaking process!
Why do you take so long to make a full pattern?
I uses the traditional technique of flat-drafting, which involves a lot of proportional maths to make a flat piece of paper fit around a 3D body - and fabric and paper behave very differently! I am also one person running my business full time, so my time is split up between a dizzying amount of necessary tasks. Imagine a hundred alarm bells going off in my head all of the time because everything needs doing all at once! That's my workday (not so different from working in hospitality). And I also need a break from the stress of this workload somewhat frequently, which means progress is paused for a few hours to a few days while I rest.
I work digitally, which cuts a lot of time out, but I also need to print and test the pattern, and make sure it looks how I want to! So that's about 3 more days on top of the research of the character's outfit and the maths required to do a first design run. Then I draft the pattern 12 more times... etc etc. It takes a long time to make a complex pattern with multiple techniques, and I also need to live my life! It's a tricky balance, and I am not a machine that churns out a pattern every week - that's not sustainable, nor would it produce a quality item.
Where can I support your work (without buying a pattern)?
I have a Ko-Fi and a Patreon! Tier 1 on Patreon is a $2 donation tier, and if you want to go a little wild you can make a custom donation. These funds go straight to sample-making costs, and anything else my business requires to run efficiently! If you were interested, Tier 2 on Patreon receives at least one pattern every month in Size 18!
I want you to make THIS pattern next! <insert pattern suggestion here>
That's a cool suggestion! I will not guarantee any pattern coming out after another unless you are a Tier 2 Patron (they are announced already for 2025, and any deviations from the set path are introduced as bonus patterns during the month). Your suggestion will join my list of patterns (there are a couple hundred) but the more people that suggest the same thing, the quicker that design gets bumped up the list!
Your size range doesn't fit me. Why?
I took measurements of my clients, friends, and family to make my patterns, and while they are real sizes of real people (just like the Big 4 do), you may not fall into the 13 sizes exactly! If it makes you feel better, I don't fit into the Big 4 at all, as my 3 measurements fall into 3 different sizes (and they're not next to each other either!). I started making patterns because OTR clothing didn't fit, and I would rather put in the effort to make something that did fit.
I want to help you with your size range and volunteer my measurements! Where can I do that?
I have a place you can do that! It takes a long time, but I will always appreciate any extra data to help improve my size range (over time, your size will not be added to my grade). All volunteered data is anonymous and will never be shared.
Where did you learn to sew?
I taught myself dressmaking (and it took a decade before I was confident enough to sell my creations), but I was taught handsewing and quilting first by my mum, my grandmother, and my nanna! Skills come from good foundations, and it's good to learn from a tutor who knows what they're doing.
What is flat drafting?
It's a way of designing a garment fully on a piece of paper, using maths!
What is draping?
It's using fabric on a mannequin to design a garment, using tension, pleats, and other forms of fabric manipulation to alter the design.
What is the difference between flat drafting and draping?
They are both valid starting points to arrive at the same result (a garment pattern) but draping is quicker for close-fitting outfits and flat-drafting is quicker for outfits with more ease!
Why don't you use CLO3D? (It's getting really good lately!)
My computer is a decade old, so rendering is awful, the software crashed frequently when I tried it, and when I tried to make a circle skirt, the method of cutting a circle out was so much more complex than doing it by hand that I decided to cut my losses and not subscribe to the software.
I do work mostly within the Adobe Creative Suite right now, and I am against the unregulated use of LLMs and DMs (aka AI, as it is currently known in 2025), as well as the idea that a company could simply take my design from me and consider it theirs just because I paid to use their software, so I don't want to add another company to the confusion.
I also find the textiles annoying to set up, largely hidden behind paywalls, and more or less incorrect - there is no guarantee the fabric you chose for the model will behave the same way in real life unless you really dialled in the specs in the software.
There is a huge industry that does enjoy the use of CLO3D and Marvellous Designer (videogames and fast fashion) but I prefer to work very differently in the traditional way, and I don't want to relearn sewing to use their interface.
Why don't you post finished outfit photos?
Because I love the process more than the final garment! I know finished outfits get more attention online than the process of making one, but it's just not as interesting to me. Setting up photoshoots is work I don't always have time for either, so it's not a priority for me. I would rather publish my patterns and keep my business running than making the numbers get bigger on social media - the two are not linked at all.
Why don't you make patterns like <this patternmaker> - I prefer their patterns because they have <these features>!
That's really cool! I'm glad you like them! Chances are, I probably speak to that patternmaker regularly and think they're super cool - and we just make different kinds of patterns! If every pattern was the same, it would be boring, and there would be no freedom of choice for you, the customer. If I don't have that feature, it's because I haven't gotten around to it, or I chose not to have it.
I want help with sewing this pattern!
Either the instructions booklet has the answers you need, or searching online or in a book has the rest of the answers! Alternatively, you can jump on the Discord and somebody there should have the knowledge to get you through it (including me!!).
I just bought a sewing machine and don't know how to use it - help?
Please check the sewing machine's manual first! It is the best guide on how to use it, as lots of sewing machines do the same thing very differently. There is no guarantee a stranger who has never seen your machine before knows what's happening (also including me!!).
I think I broke my sewing machine - what should I do?
Don't buy a new one, and don't give up. It's a machine, and you can get it serviced! The expert behind the desk can tell you what's gone wrong and if they can fix it (and it's way cheaper to do so). If you truly broke it, I can't help, only an expert who fixes machines for a living can do that (not my job, I'm a patternmaker).
I don't know how to handsew!
Don't worry, it's very easy to learn, and requires the least amount of items in a sewing kit - needle, thread, fabric! A thimble and thread scissors are nice-to-haves (especially if you end up doing a lot of handsewing later), but that's pretty much it. Otherwise, the technique of handsewing is as old as language, and every culture ever has done it. There's a STAGGERING amount of resources on it, and they pretty much use the same techniques with different names. I generally refer to whipstitch, running stitch, and backstitch in patterns, unless I'm talking about embroidery or buttonholes. There are countless hours of handsewing content on visual media platforms, and I encourage you to take an hour to learn at least one stitch before jumping back into the costume you were making.
I hate handsewing - but you've written it in the instructions. Do I have to?
Nope! Handsewing gives a lot more control over the part of the garment you're sewing, and I usually employ it for strength or for invisibility. If you want, you can backstitch on the machine for strength. You can also topstitch something closed - it will just be visible on the other side, because that's what sewing machines do when they stitch. You never have to follow my instructions 100%! I'm just some rando on the internet who made a pattern, not some glorified Sewing God who will zap you with lightning if your stitches aren't exactly 2mm apart. You know how you work best, and your way is just as likely to get this costume finished as my way.
I want to buy your pattern to help make an outfit someone else commissioned me to make. Is that allowed?
Absolutely! I would appreciate being tagged in photos to see the final result, and it helps other people know where you got the pattern from and what my pattern can result in. I always enjoy knowing where my hard work has helped people! It's not required but it warms my heart to see it! ♥
Can I buy your pattern and then enter my cosplay I made from it in a competition?
Yes - and definitely mention me to the judges if my pattern was a part of the creation process, because you have to mention something you didn't make! You can also mentioned the alterations you made to the pattern, but you can't claim the whole pattern as your own fully. Please tag me in photos and videos too because I want to see you on stage!! That's so fun!!
I don't like the way your instructions read, and would prefer to do it my way!
Go for it! I'm with Barbossa on this one - they're not rules, merely guidelines. The instructions are there for those who need them, and if you don't, feel free to ignore them!
Can I hot glue my seams?
Uhhh, sure. Not all glue bonds to fabric, and not forever either (especially if you deal with extreme temperatures). I can't stop you! Do whatever you like! But entropy can get in through a sealed box, regardless of how much duct tape is on the lid.
I bought your pattern and I have a bunch of friends who want to use it. Can I share it with them?
Please don't. I can't stop you, I can only hope to convince you not to. This is my business, and my only source of income. I appreciate that money is tight right now (yayy recessions) but money is tight for me too! I hope you consider buying my patterns as a way of supporting me, because if these patterns are shared for free, I stop earning money and I would eventually be forced to close down my business, and take my patterns off the market.
This is my dream job and I hope to continue making patterns for the cosplay and costuming communities, and those interested in making their own daily wardrobe! Every pattern purchased pays me back for the time I spend making my business successful (which tends to be most hours, every day). Every so often I run sales and have discounts, so try to keep an eye out for those if you would like to save money!
Your pattern isn't accurate and you've added seams, darts, extra layers, a detail is missing, or something else is wrong - why is that?
I'm merely human! And character references can vary WILDLY depending on the source. A lot of my design choices are based in the perceived fabric and my understanding of how it should behave when it's sewn into that shape. I come up with original garment designs because a character looks to be wearing many layers, which are designed to give the effect of looking like the character, or might just be inspired by them! I'm using creative freedom and knowledge to provide you with a wearable garment that won't come apart or expose you on the convention floor. With knowledge comes opinion, and sometimes my opinion includes forgoing a detail in the character design that is impossible or difficult for a complete beginner to cosplay.
The biggest issue with cosplay is that game devs, animators, and other people in the industry that made the character probably didn't go to fashion school and it's unlikely that they know what has to happen to make clothing like that a reality. Which makes it even trickier if it's a fantasy or sci-fi game and impossible things are probable in that world!
If you figured out that I left something out of the design, you are welcome to add it back in! I am unlikely to change the pattern, however, and probably already know about it.
Do you make projector patterns?
Not yet, but once I have my own short-throw projector and figure out how to make the pattern you can bet they'll become a thing! It will save me a lot of money on paper and printer ink, that's for sure.
You've got a Maelle pattern out - are you making anyone else from Clair Obscur?
Yes!! I have plans for ALL OF THEM and I'm VERY EXCITED. It's still early days and I don't want to spoil the game for anyone, but consider the whole team possible - yes, even THAT one.
Have you finished <this game>? I want you to make the pattern for <endgame character>!
AAAGH NO. I don't have lots of time to play games or watch movies/tv shows/animes because I'm making the patterns, and I also hate spoilers! I still haven't finished Baldur's Gate 3 - but I'm working on that! Having fun just takes longer than making a pattern does! If you want an endgame character, please ask if I've finished the media/mind spoilers first. Anything outside of the trailer is considered spoiler territory. I love watching a good story unfold, so let me have my enrichment in my patternmaking cage! I avoid posting spoilers, even in my super cryptic pattern names, just in case it spoils the plot for an unsuspecting customer.
What other patterns are you going to make?
My wheelhouse is mostly inspired by BG3, Clair Obscur, Fromsoft games, Overwatch, and many other titles in those genres! I am very fantasy, LARP-y, D&D, medieval, Victorian, Edwardian, cottagecore-themed, and I am chomping at the bit to get my original designs out (but they'll have to get through my pattern testers successfully first!). Modern wardrobe pieces are also on the menu, with a bit of a fantasy or vintage flair. It's mostly announced on my instagram!